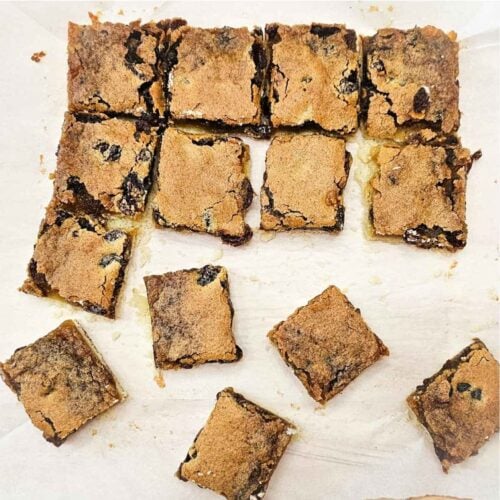
Old Fashioned Butter Tart Squares
These old fashioned butter tart squares are a popular Canadian dessert with a buttery shortbread crust that’s topped with a rich, gooey filling.
There’s nothing quite like the taste of a classic Canadian butter tart, a dessert that first appeared in print in 1900 in a Canadian cookbook called the Royal Victoria Cook Book.
If you are however, looking for a quicker and easier version that doesn’t require fussing around with tart shells, these butter tart squares are the way to go!
These squares are a staple on so many Canadian tables, especially for Christmas and Thanksgiving, where a plate of butter tart squares often sits alongside pies, cookies, and other nostalgic holiday treats like orange fluff, apple crisp, rice pudding, and apple cake.
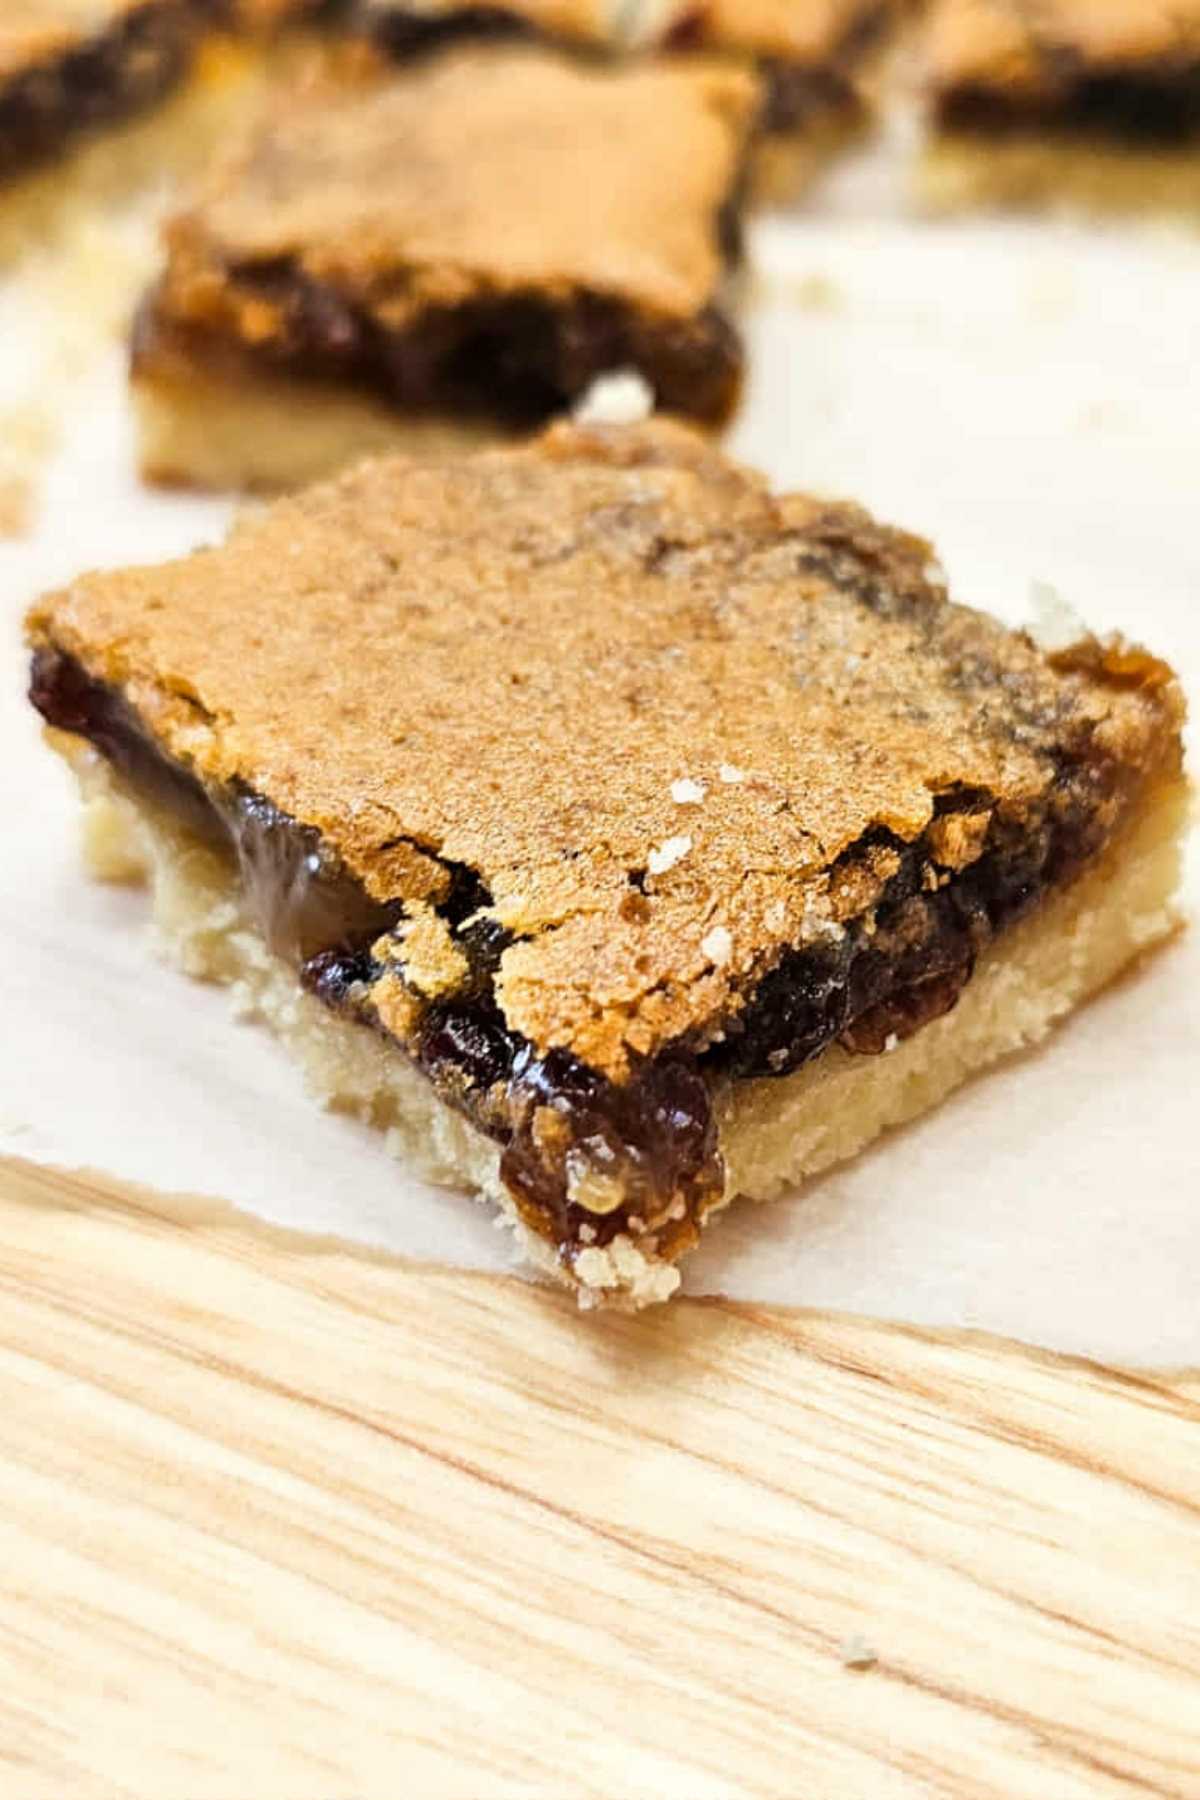
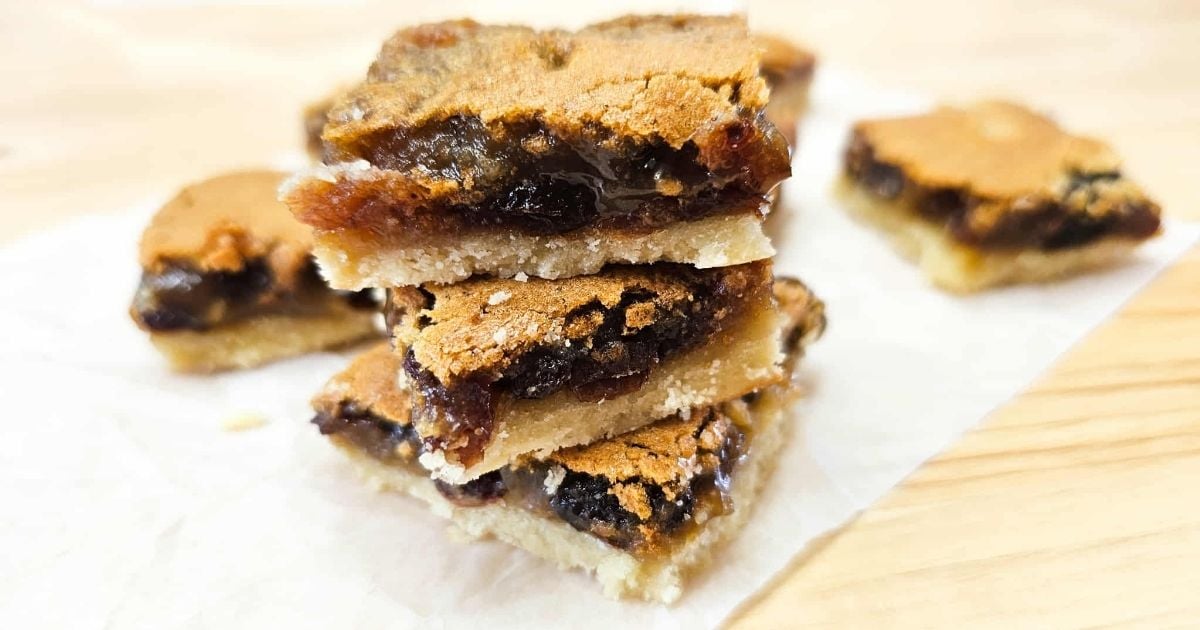
This recipe uses a buttery shortbread crust and a sweet, gooey filling with raisins that’s poured right on top. You might be surprised to see vinegar in the ingredients list but this is added to balance out the sweetness from the sugar.
What You’ll love about this recipe
What you’ll love about this recipe is that it can be made ahead of time, tucked into the freezer, and thawed at room temperature for 30 minutes. Its perfect for when you want to make desserts ahead of time for the holidays.
Recipe Ingredients
Lets talk ingredients! Here’s everything you’ll need to make these squares.
- Un-Salted Butter
- Icing Sugar- Also known as powdered sugar or confectioner’s sugar
- All Purpose Flour- I used un-bleached all purpose flour
- Light Brown Sugar- You can also use dark brown sugar if you’d like
- Vinegar
- Large Eggs
- Vanilla Extract- Real or artificial works fine
- Raisins- These are optional, as some people abhor them
See recipe card for quantities.
How to make this recipe
Use these photos as a guide as you move along each step.
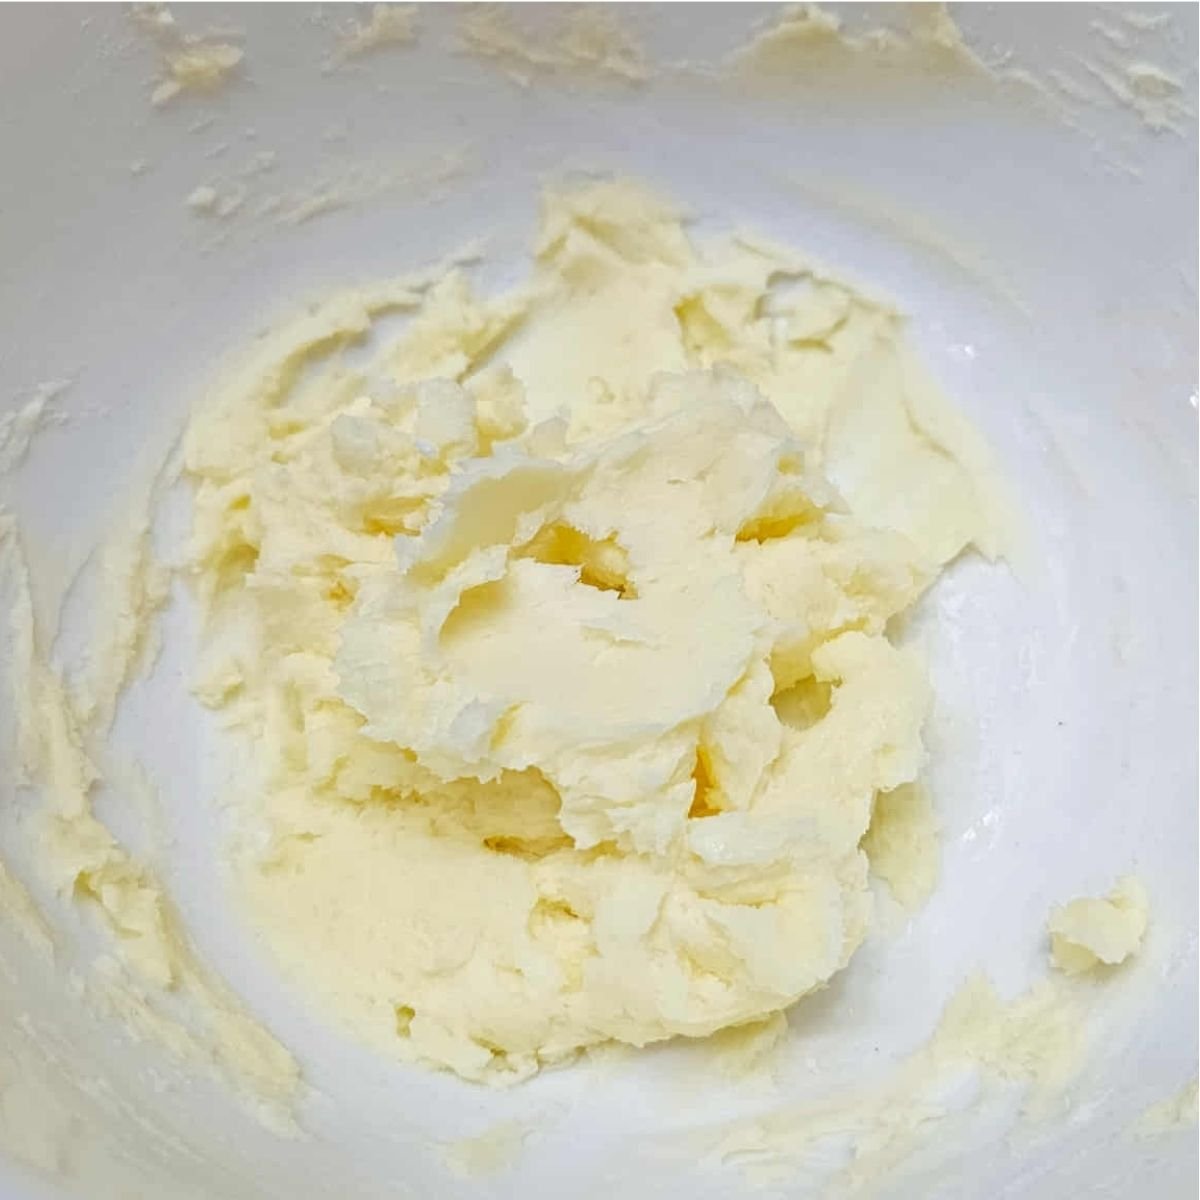
- Step 1: Mix the icing sugar and butter together in a medium bowl.

- Step 2: Add in the flour and mix together with your hands.
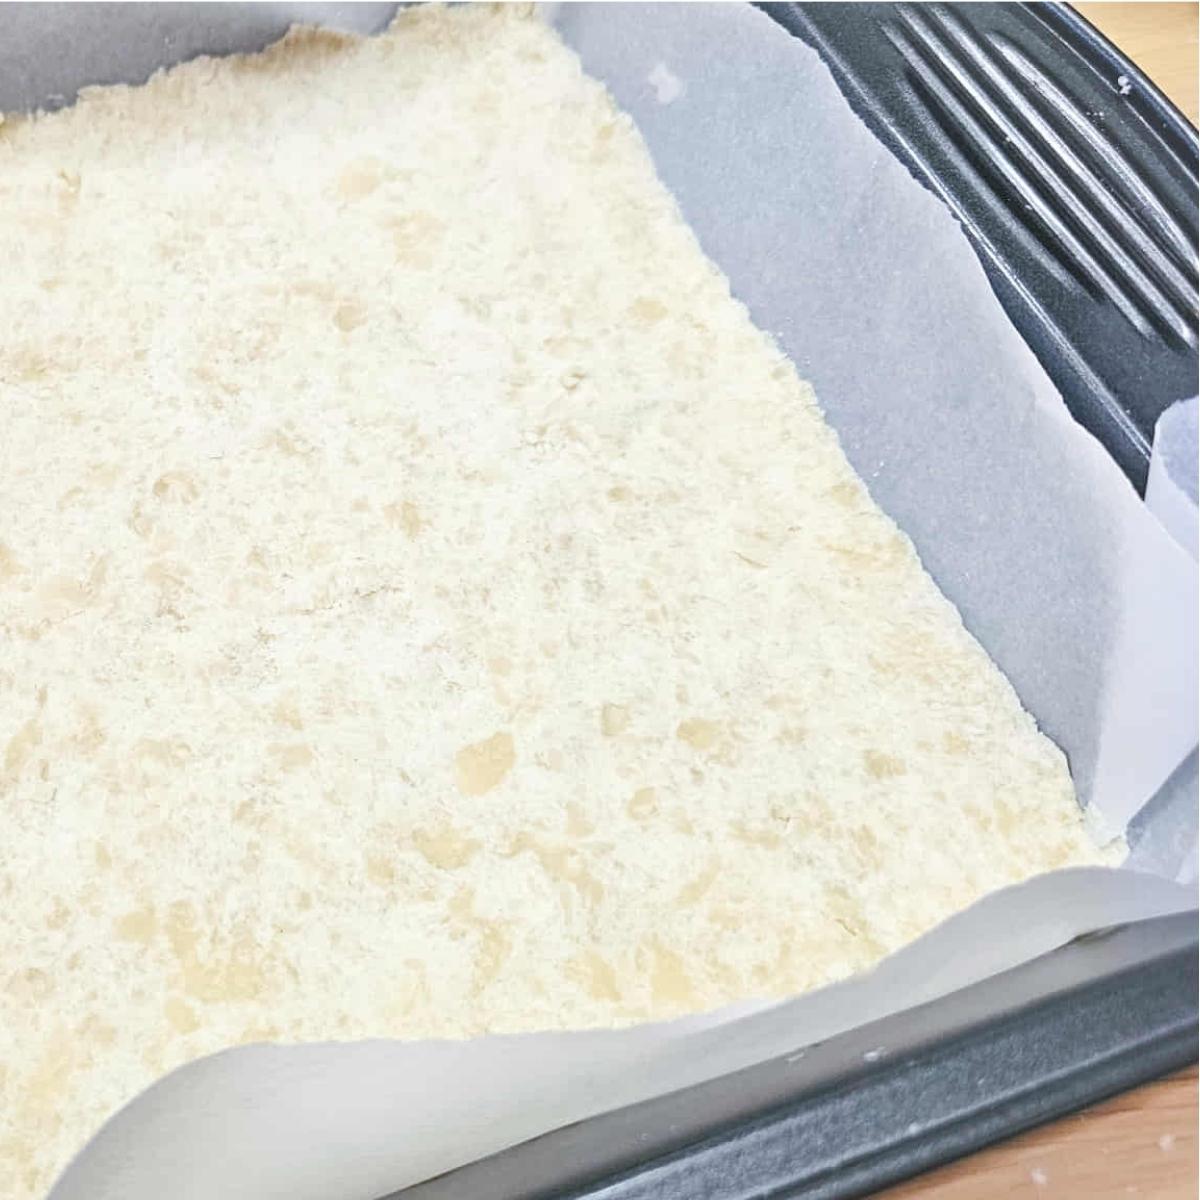
- Step 3: Add to a 9×9 parchment lined pan and press into the pan very well. Bake for 5 minutes and then remove it from the oven.
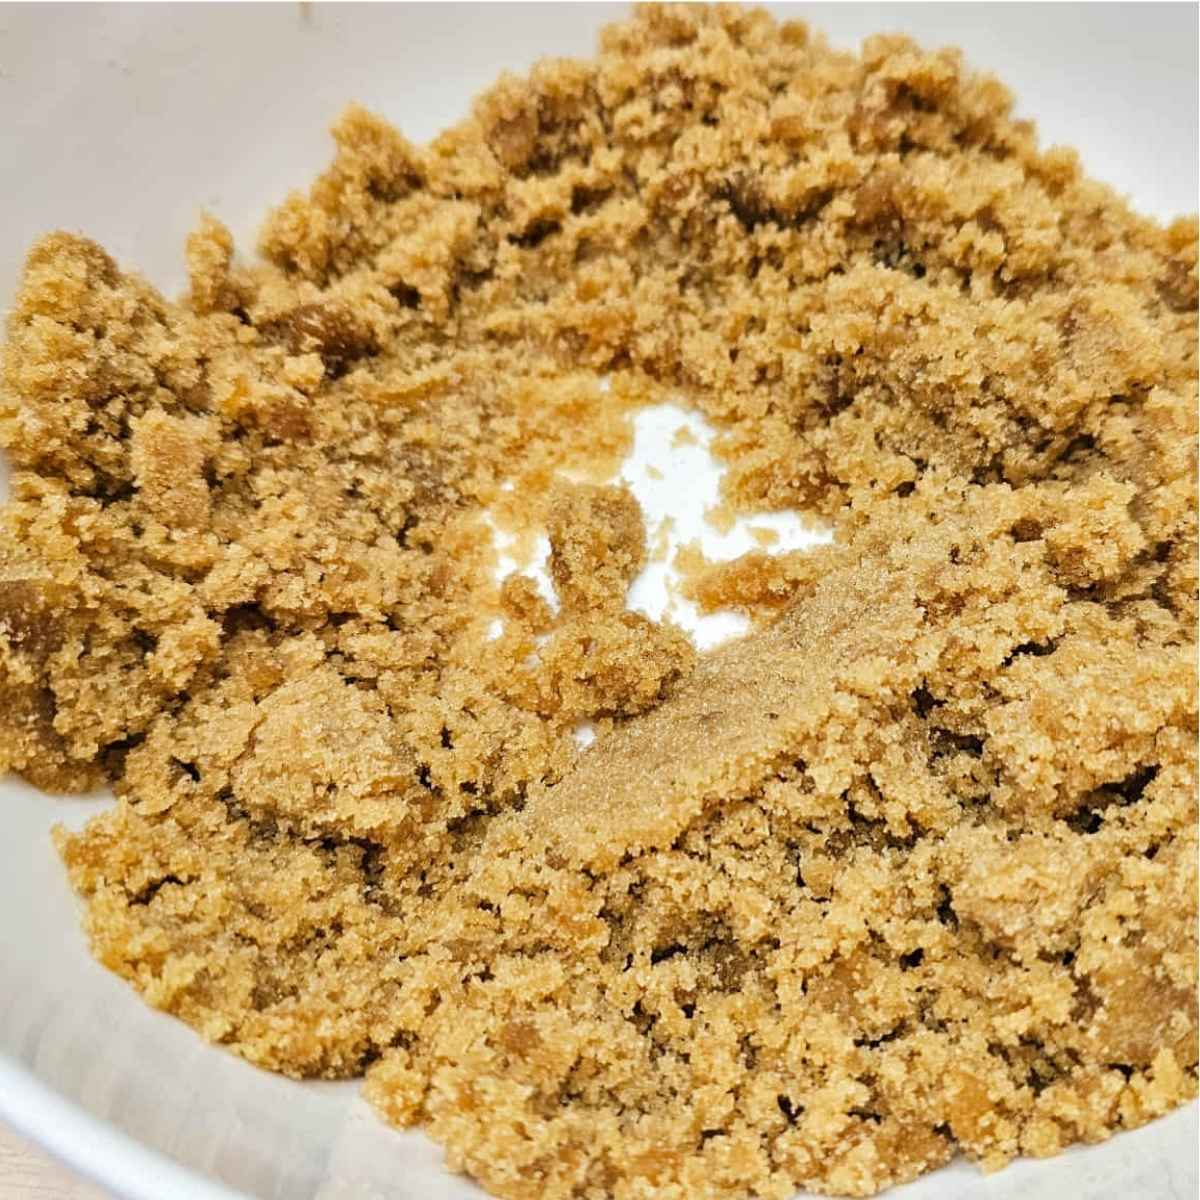
- Step 4: Make the filling while the crust bakes. Mix together the brown sugar and butter in a medium bowl.
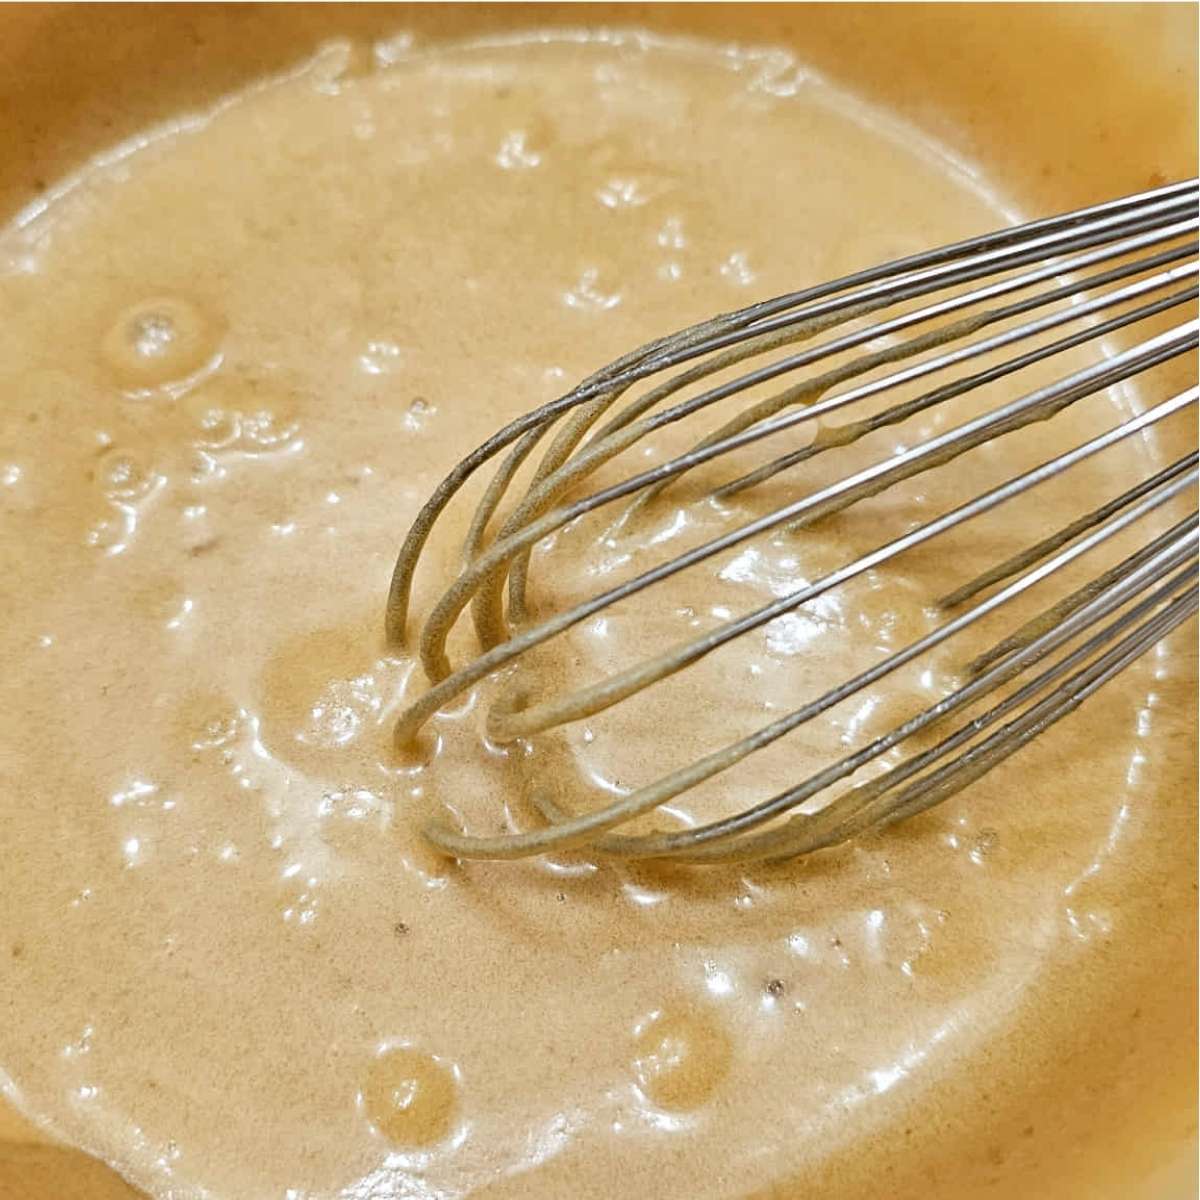
- Step 5: Whisk in the eggs, then the vinegar and lastly the vanilla.
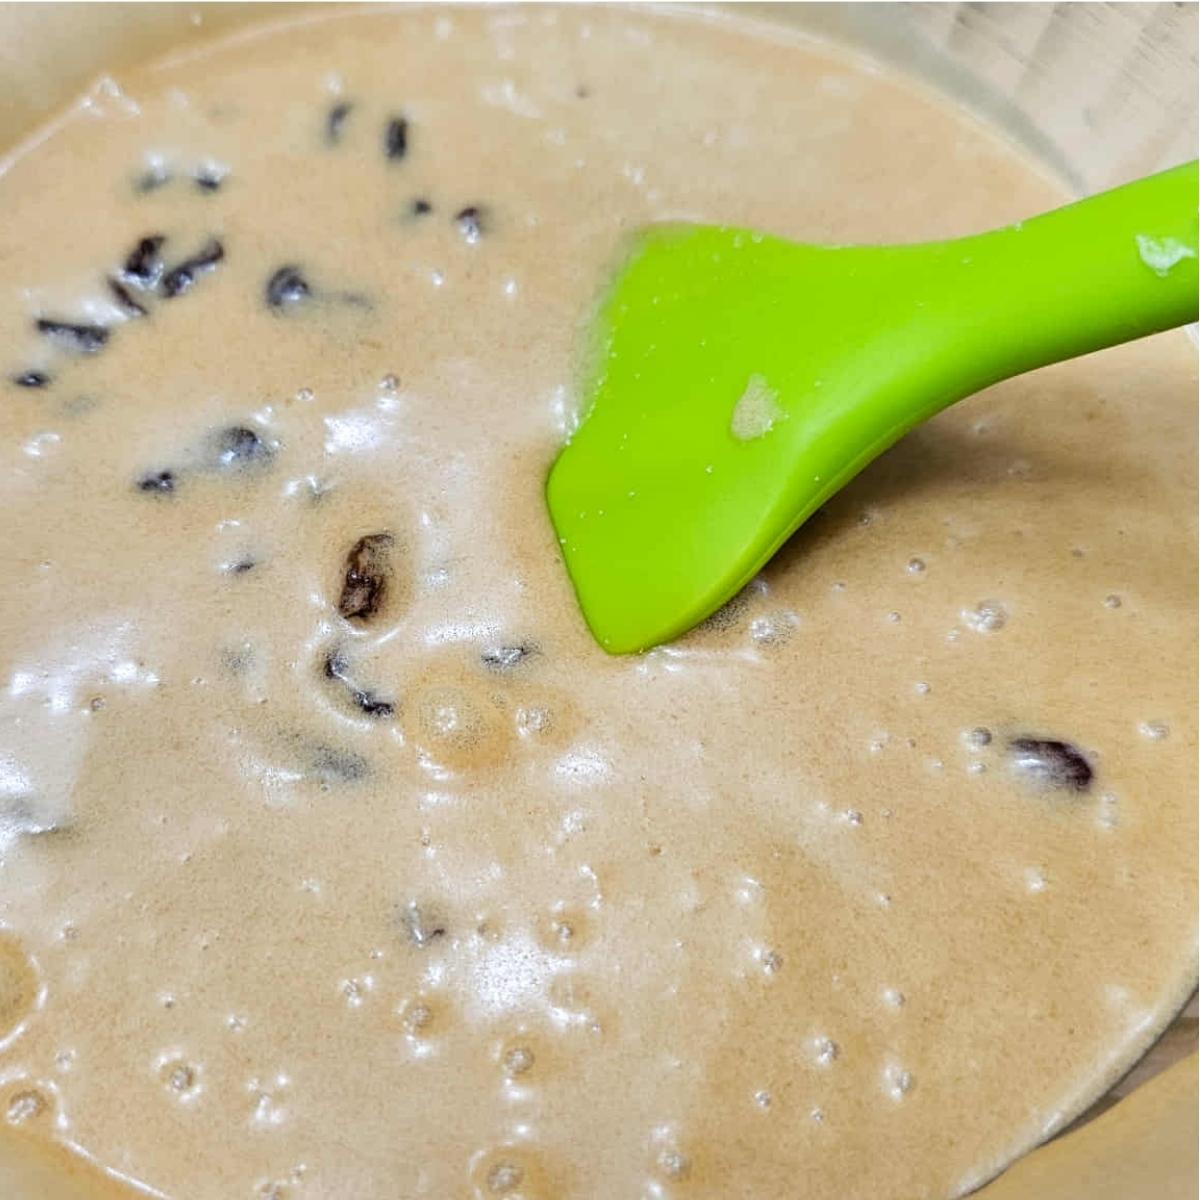
- Step 6: Add in the raisins and mix.
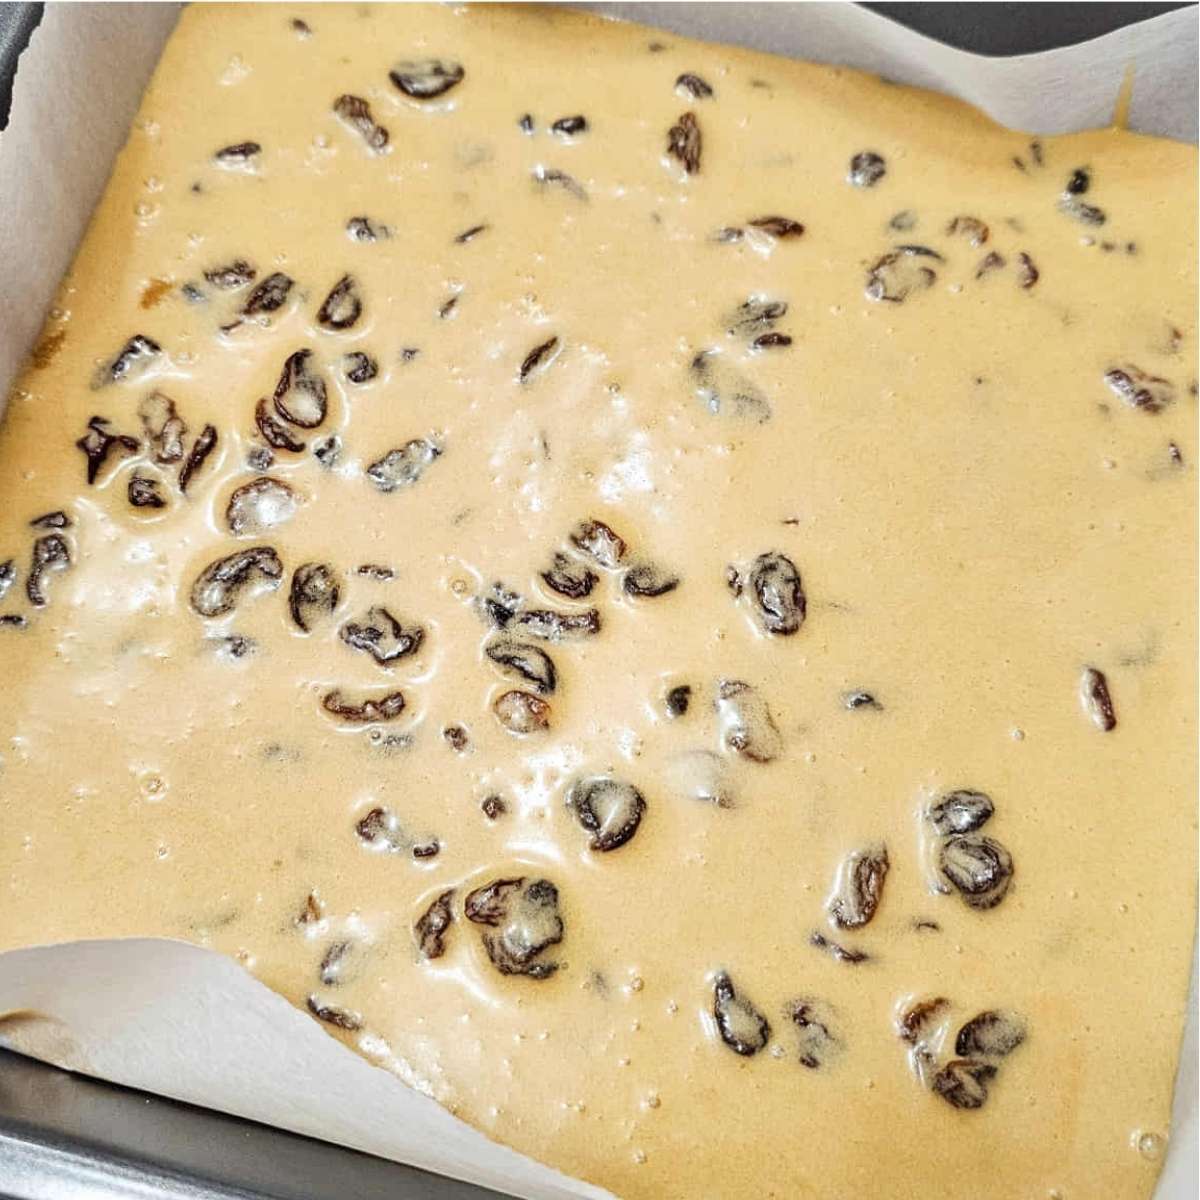
- Step 7: Pour over the crust and gently spread out the raisins evenly.
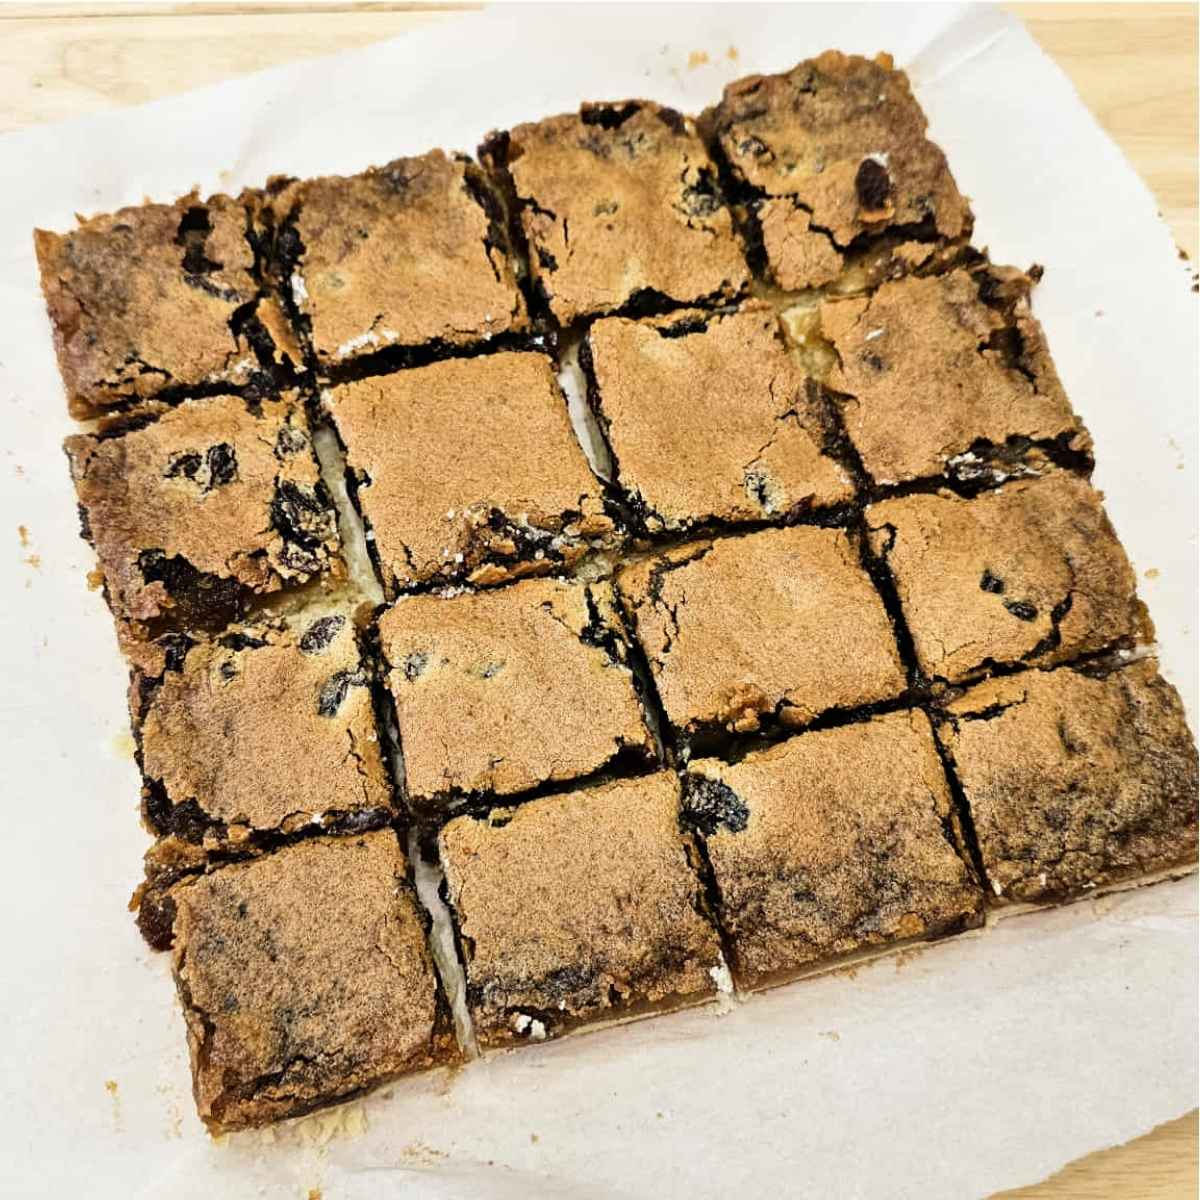
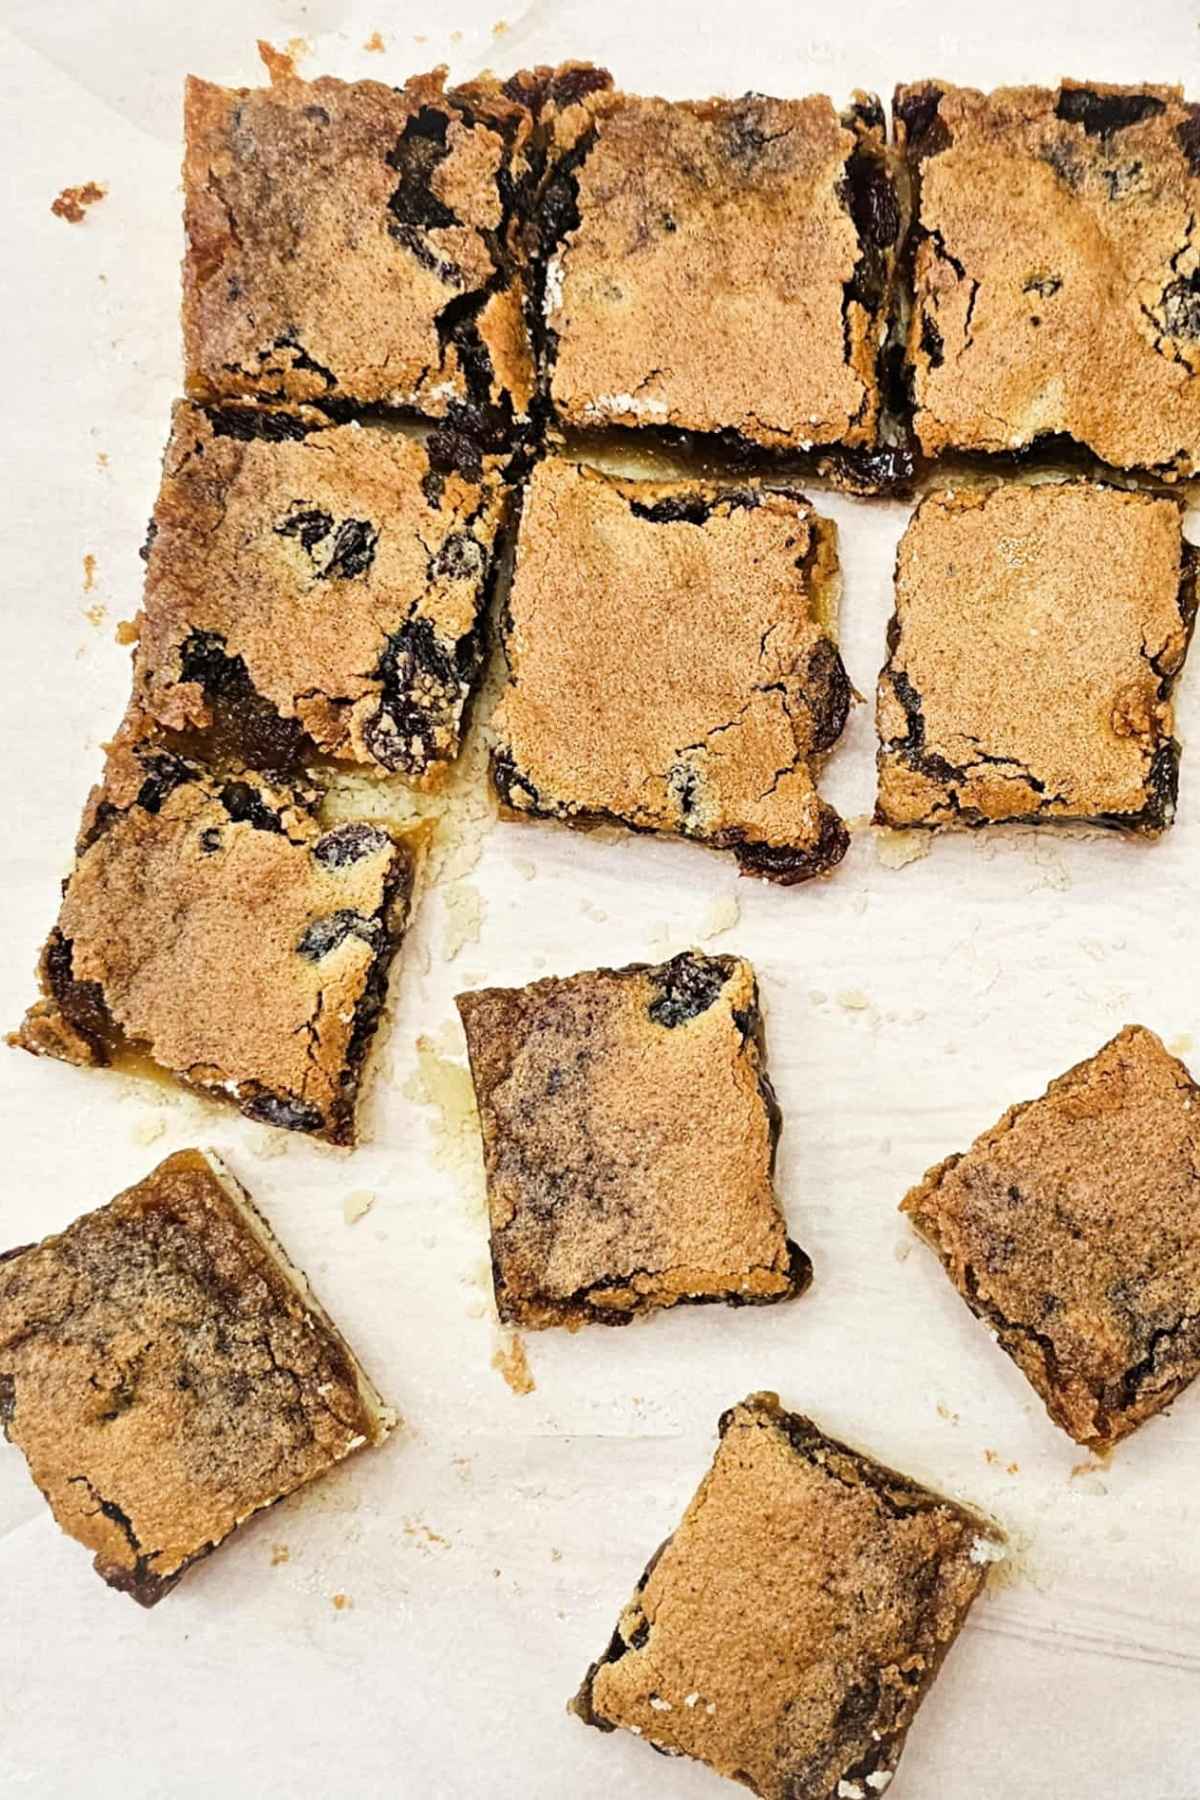
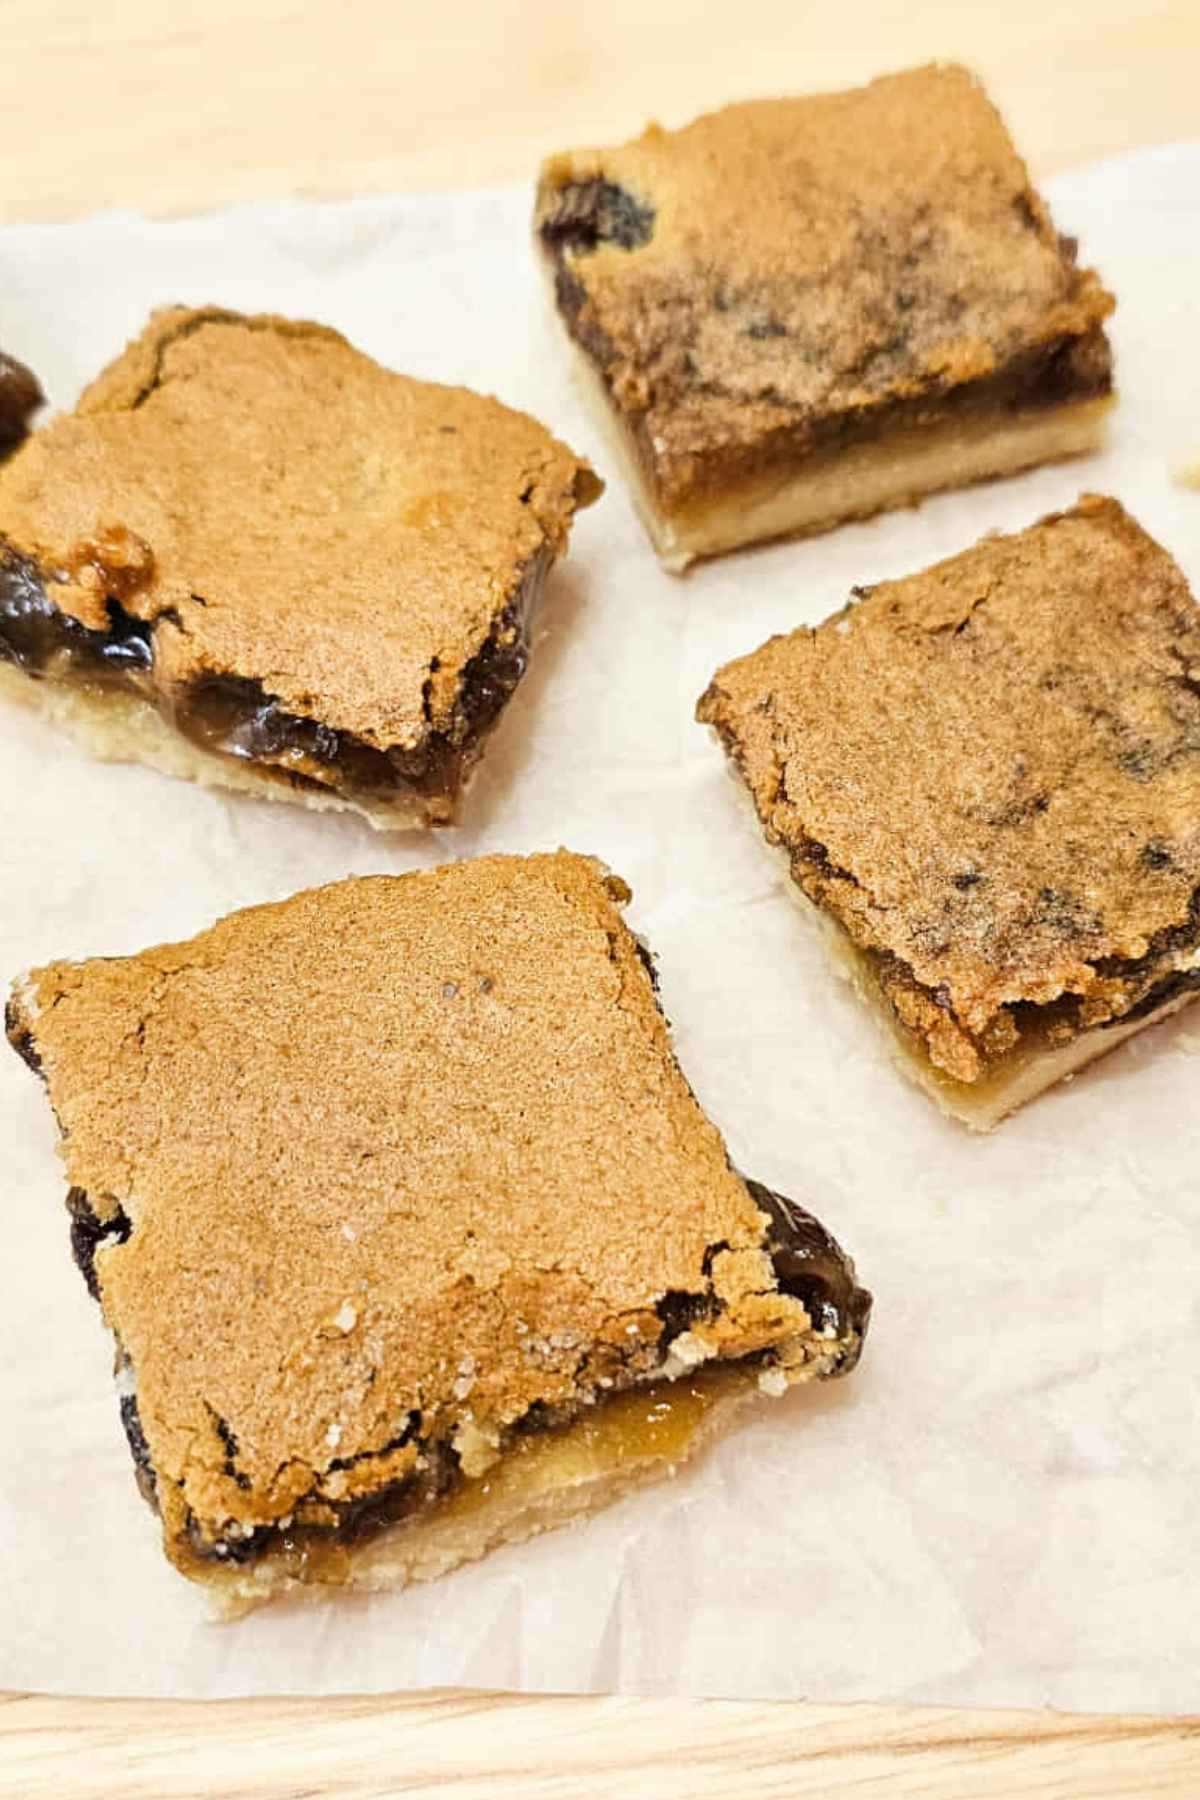
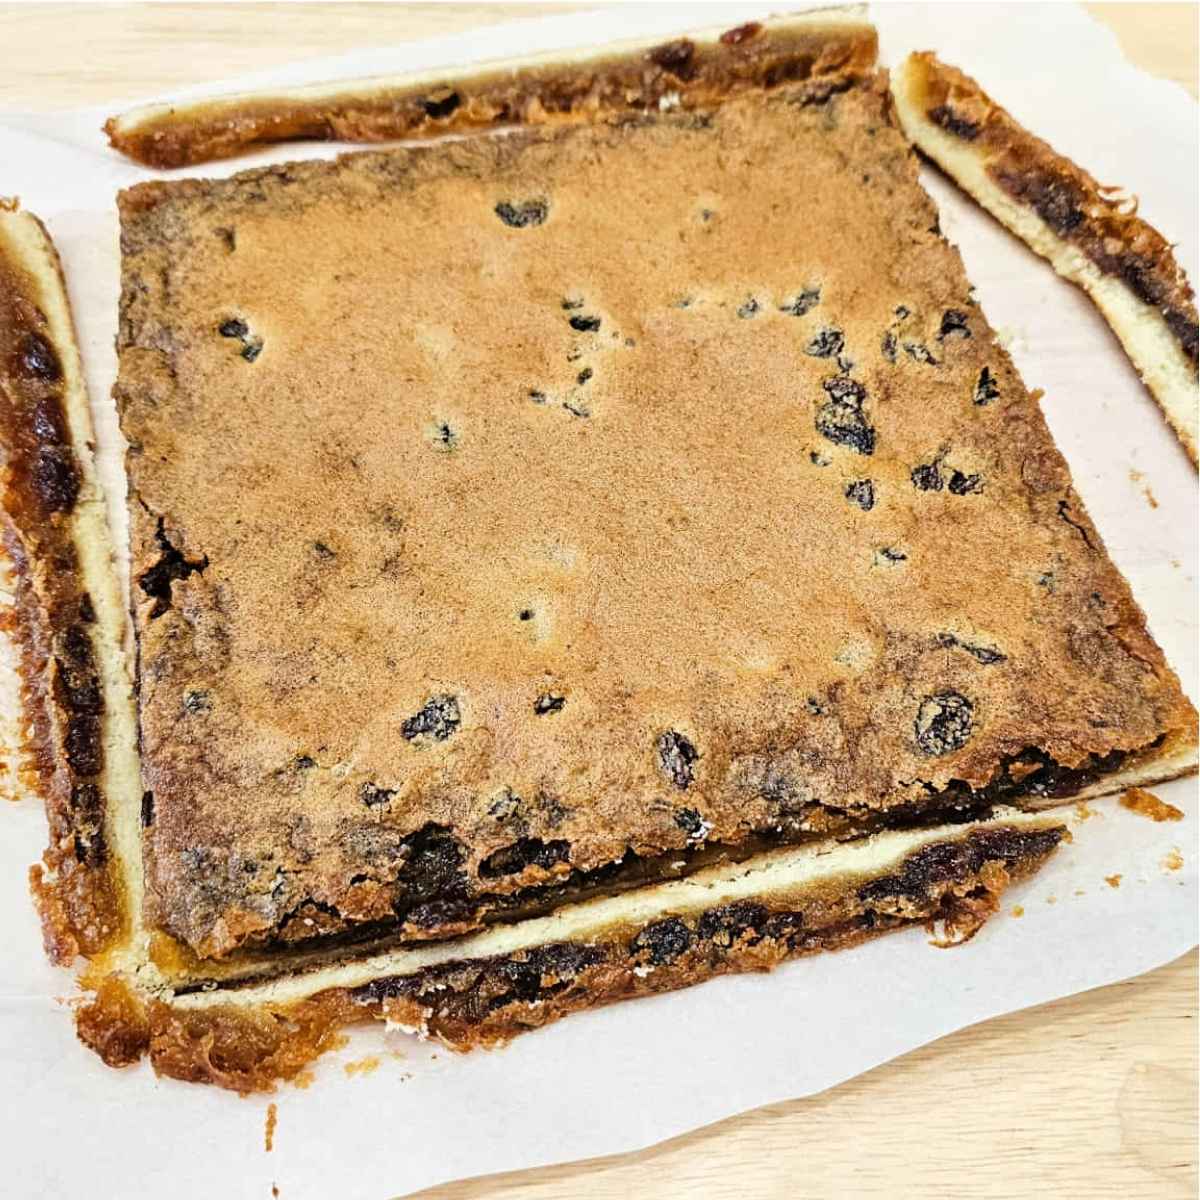
- Step 8: Bake for 25-27 minutes or until the filling is firm and it no longer jiggles. Cool in the pan on a wire rack then slice once it’s completely cooled.
If you’d like you can trim the edges off before slicing into squares so you will have a smooth edge.
Hint: Your butter tart squares are ready when the filling is set and no longer jiggles in the center. Start by baking for the minimum time, then add a few extra minutes if needed until the filling is firm.
Storage
Fridge: Store them in the fridge in an air tight container with parchment paper between the layers for up to 1 week
Freezing: Store them in the freezer in an airtight container or in a freezer bag with parchment paper between the layers for up to 3 months.
Old Fashioned Butter Tart Squares
Ingredients
Crust:
- 1/2 cup un-salted butter
- 2 Tablespoons icing sugar
- 1 1/2 cup all purpose flour
Filling:
- 1 1/2 cup light brown sugar
- 1/4 cup un-salted butter melted
- 2 large eggs
- 1 Tablespoon white distilled vinegar
- 1 teaspoon vanilla extract
- 1 cup raisins
Instructions
- Pre-heat the oven to 350.
- Line a 9×9 inch pan with parchment paper and set it aside.
- Mix together the butter and icing sugar in a medium bowl.
- Mix in the flour with your hands until well combined.
- Press into the pan, making sure to press it down very well.
- Bake for 5 minutes and then remove it from the oven.
- While the crust bakes, make the filling.
- In a medium bowl add in the brown sugar and butter and mix well.
- Whisk in the eggs, vinegar and then the vanilla.
- Add in the raisins and mix.
- Pour over the crust and gently spread out the raisins evenly.
- Bake for 25-27 minutes, or until the filling is set and doesn’t jiggle anymore when the pan is lightly shook.
- Cool in the pan on a wire rack until it completely cools.
- Once completely cooled, remove from the pan and slice into desired sized pieces.
- DO NOT SLICE WHEN HOT.
Video

Notes
FAQ
Yes, the earliest know recipe for butter tarts is from Canada in 1900 from a cookbook called the Royal Victoria Cook Book
It is recommended for longer storage and the texture is best when stored in the fridge as well.
Leave a comment below if you made this recipe, I’d love to hear feedback.
Related
Looking for more squares recipes? Try these:

I am so excited to try this recipe! I didn’t know you could make butter tarts outside of the shells. And it’s awesome that you can freeze them for later! Do I have to adjust anything if I don’t want raisins?
I think it would turn out alright, maybe you can replace them with some pecans if you’re worried about it